Recently I had the chance to try something I’ve wanted to do for quite a while…astrophotography! July 30th I was ready. I drove with my friend to Spruce Knob, WV to try my hand at capturing the stars. It did not disappoint…I’m hooked, and I’m pretty sure I’ll be back on top of a mountain or out in a field with my camera on another dark night sometime soon. I learned a lot, and even though I watched a lot of tutorials and read a lot of blogs to prep for my first experience, there were a number of things I wish I had known. So this blog post is for all those aspiring astrophotographers who are literally starting from scratch, like me.
Getting Ready
There are tons of YouTube tutorials that get into camera settings and the kinds of lenses you should have. I found a tutorial specific to my camera and lens (a Sony a7iii with a Samyang 14mm 2.8), which is one of the recommended “beginner” combos for astrophotography. Wide angle, fast lenses and full frame sensor cameras are the general recommendation for astrophotography, but I recommend Googling or hitting up YouTube for information about your specific camera and lens combo. You’ll also need a sturdy tripod. A headlamp with a red light mode is another good recommendation.
Next, research the moon and stars. I searched for nights that were on or around the new moon when there would be a lengthy period of darkness between sunset and moonrise. You need truly dark skies (without the light of the moon) for the best results. I also sought out sites within driving distance where there is little light pollution. That left only a few days each month when conditions would be ideal and since I needed a weekend night in order to make the drive, my options were even more limited. Then, I checked weather reports for my target date as it approached and hoped for clear weather. About 24 hours before my attempt, it started looking a bit cloudier than I’d hoped. I ended up searching for different dark sky locations and found astronomy-specific weather charts called “clear sky charts.” Here’s the one I found for Spruce Knob, WV (one of the best dark sky sites near Washington, DC): https://www.cleardarksky.com/c/spruce_WVkey.html

My second favorite shot of the night
The clear sky chart showed great conditions for stargazing on my target date, so we crossed our fingers and made the drive. Luckily, the chart turned out to be a much better predictor of conditions than the Weather Channel app and we had beautiful clear skies with just a few clouds on the horizon (which actually made for more interesting pictures).
The Night Of
We decided to get up to the top of the mountain in time to see the last bit of sunset. We weren’t sure what the road would be like nor how tough navigating to the site would be so we wanted to do the drive in daylight. I think that was a good call, but now that I know the site I’d either go at the same time and plan a bit differently or I’d go later in the evening once the sky was darker. The downside of getting there at sunset is that it doesn’t get really dark for another 2-3 hours. We got some dramatic sunset shots, which were great but I was excited for the stars, so as soon as it seemed dark I started taking pictures. We left the mountain around 11:15pm since we needed to get back to work the next day, but I wish we’d been up there from 11pm-2am instead. The sky was only getting darker and more impressive the longer we stayed out and the pictures I took last are by far the best. If I did go up for sunset again, I’d rest my eyes at regular intervals. Focusing on your camera display, then up at the stars, and then looking at info on your phone, etc. tires out your eyes. I wish I’d rested them for 20-30 minutes at a time and saved my vision for the real darkness. Don’t forget to check your lens for condensation as well. I started getting blurry photos thinking a mist or fog had rolled in and only noticed that it was fog on my lens as I was packing up. I cleaned it off and took a few more shots and those ended up being my best of the night.
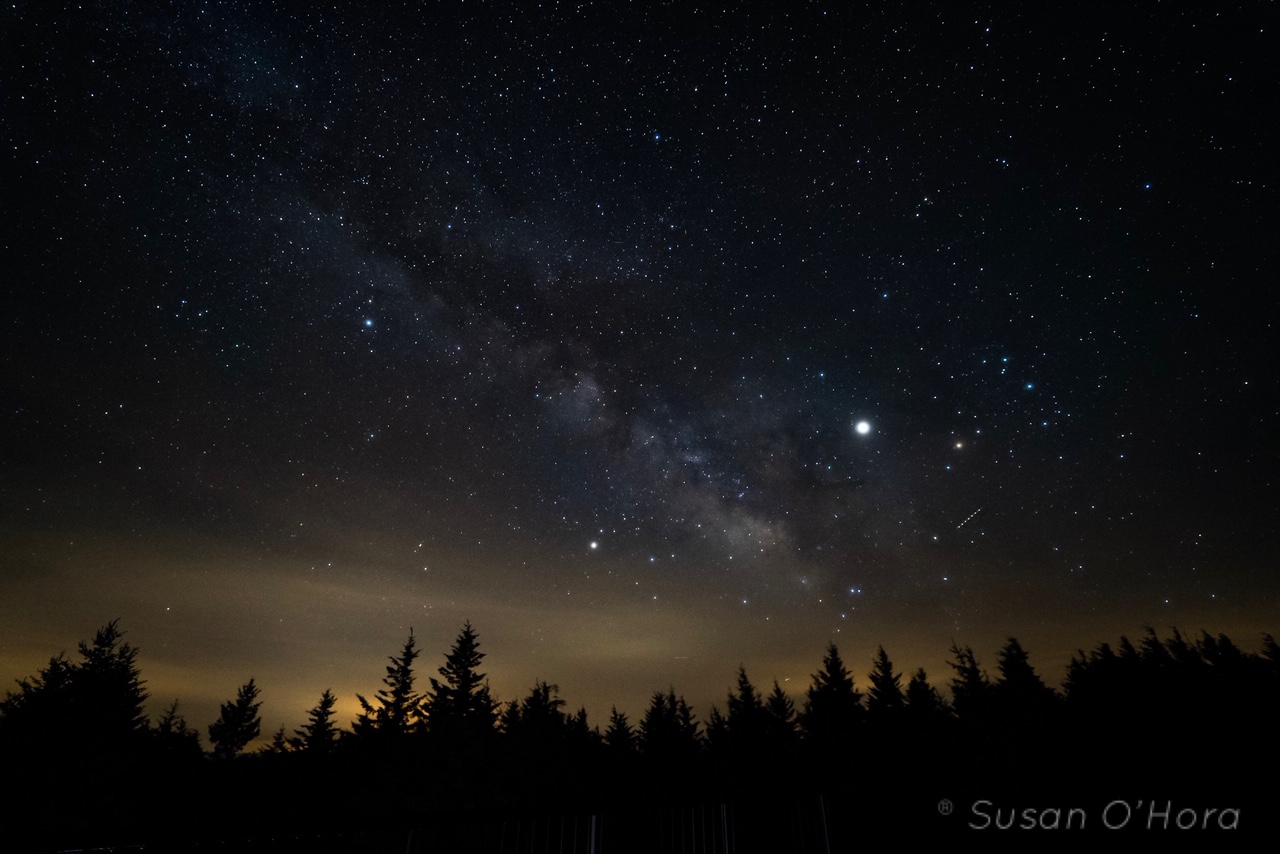
My favorite shot of the night!
Apps like “Sky Guide” are great for showing you where the Milky Way is before it’s visible with the naked eye. You can also enter date, time and location information in advance and get a preview of the sky for your target dates. The compass in it wasn’t super accurate on top of the mountain though. I definitely spent time tinkering with the app when I should have been resting my eyes instead. My advice would be to use an app to plan how the Milky Way will travel through the sky for the hours you’ll be out, then try to rely on your vision for spotting it in the moment (and perhaps bring an old-fashioned compass).
This is a really simple thing, but we also wish we’d brought chairs. There is a viewing platform on Spruce Knob that is perfect for stargazing, but it’s simply a concrete slab. Being able to sit would have made being up there a few more hours more feasible. I am glad we did not bring food however…the area has quite a bit of wildlife, including bears. When you’re on the top of the mountain, all you can hear is the wind through the pines (which sounds like the ocean) and birds. Not having anything on us that would attract larger wildlife made us feel a bit more secure.
Lastly, I experimented with different exposure lengths but a lot of the tinkering I’d planned to do when I got up there simply fell by the wayside once I got started. I didn’t experiment with as many exposure lengths as I’d wanted to, nor did I take any photos off the platform. I even planned to take a few with my Sony 85mm 1.8 but I forgot to do that too. In the dark, with the Milky Way above it’s easy to lose yourself and forget all your best laid plans. Don’t forget to try a lot of different things, or lose yourself in the moment totally (as I did) and then plan to go back.